文章目錄
將 ASP.NET Identity 加至 ASP.NET MVC Empty 專案中
MVC 預設專案範本 v.s. MVC Empty 專案範本,你會怎麼選呢? 這個問題前些日子也在網路上掀起熱鬧的討論,相信大家都有各自的喜好,但不可否認的是預設範本帶來的便利性以及提供基本使用方式的示範效果,而 Empty 範本則是讓工程師對專案程式碼有更高的掌握度避免預設載入無用套件
過去我比較喜歡使用預設範本,為的是簡單修改就能有基本雛型功能,但近來我則是較喜歡 Empty 範本的簡單,Empty 範本不會預設加入用不到但又不知道能不能拿掉的套件,日後維護成本較低,不過我還是習慣透過預設範本來了解該如何使用
今天就來紀錄一下,該如何在 MVC Empty 專案中加入 ASP.NET Identity 吧
使用空專案範本建立專案

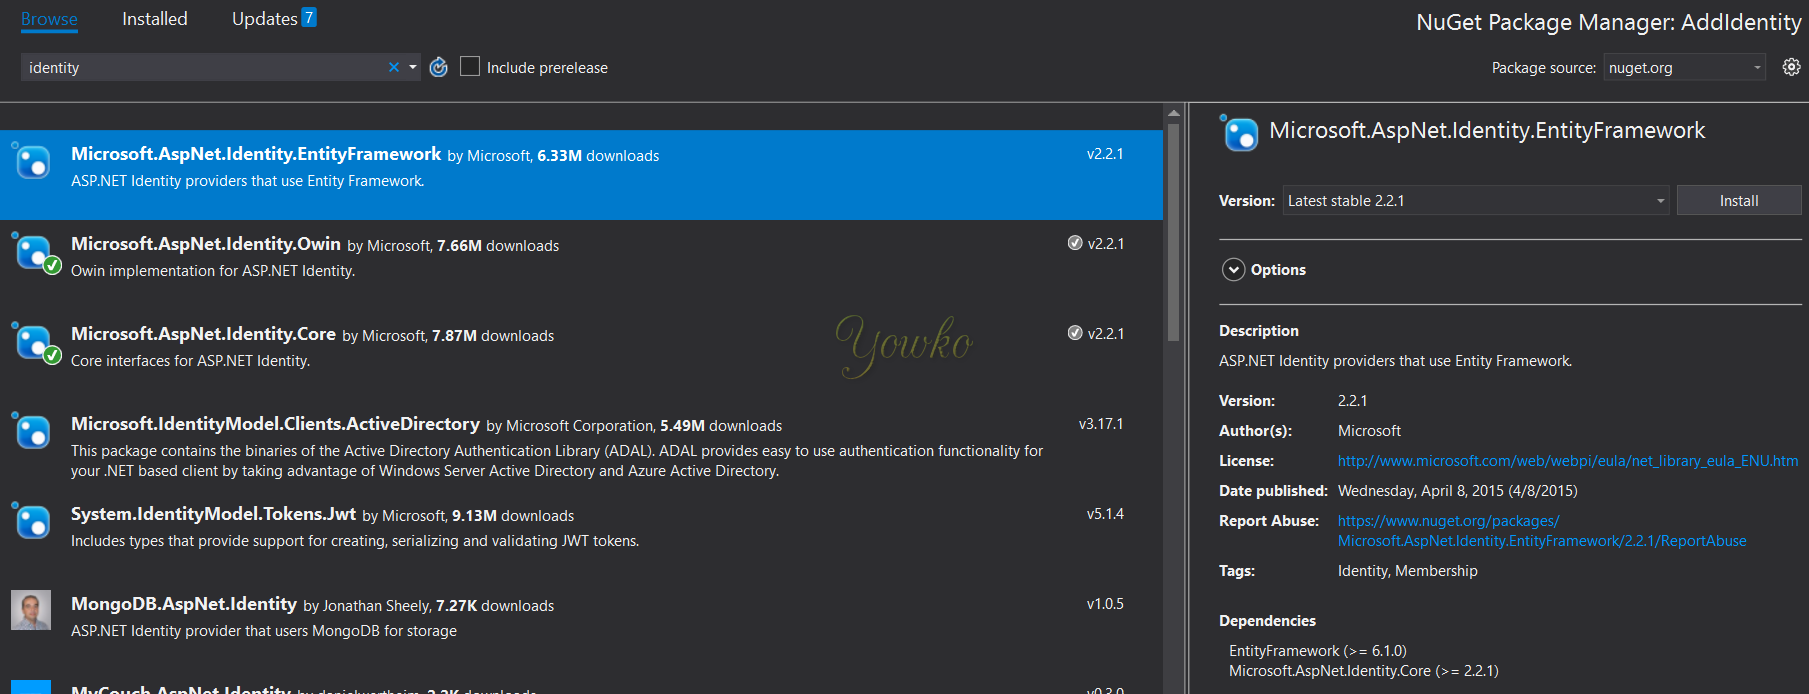
安裝 ASP.NET Identity 相關套件
Microsoft.AspNet.Identity.Owin
相依套件
- Microsoft.Owin.Security.OAuth (>= 2.1.0)
- Microsoft.Owin.Security (>= 2.1.0)
- Microsoft.AspNet.Identity.Core (>= 2.2.1)
- Microsoft.Owin.Security.Cookies (>= 2.1.0)
指令安裝 > Install-Package Microsoft.AspNet.Identity.Owin

Microsoft.AspNet.Identity.EntityFramework
相依套件
- EntityFramework (>= 6.1.0)
- Microsoft.AspNet.Identity.Core (>= 2.2.1)
指令安裝
Install-Package Microsoft.AspNet.Identity.EntityFramework
Microsoft.Owin.Host.SystemWeb
相依套件
- Owin (>= 1.0.0)
- Microsoft.Owin (>= 3.1.0)
指令安裝
Install-Package Microsoft.Owin.Host.SystemWeb

建議安裝 NuGet 套件後將所有 NuGet 套件更新
指令更新
Update-Package
在 Model 資料中加入 UserModel
建立
CustomUser並繼承IdentityUserpublic class CustomUser: IdentityUser在
CustomUser中建立GenerateUserIdentityAsync要方法public async Task<ClaimsIdentity> GenerateUserIdentityAsync(UserManager<CustomUser> manager) { var userIdentity = await manager.CreateIdentityAsync(this, DefaultAuthenticationTypes.ApplicationCookie); return userIdentity; }加入需要的自訂屬性
這邊透過
Address來示範public string Address { get; set; }UserModel 完整程式碼
using System.Security.Claims;
using System.Threading.Tasks;
using Microsoft.AspNet.Identity;
using Microsoft.AspNet.Identity.EntityFramework;

namespace AddIdentity.Models
{
    public class CustomUser: IdentityUser
    {
        public async Task<ClaimsIdentity> GenerateUserIdentityAsync(UserManager<IdentityUser> manager)
        {
            var userIdentity = await manager.CreateIdentityAsync(this, DefaultAuthenticationTypes.ApplicationCookie);
            return userIdentity;
        }
        public string Address { get; set; }
    }
}
在 Models 中建立 DB 溝通用物件
建立
ApplicationDbContext繼承至IdentityDbContext<CustomUser>public class ApplicationDbContext : IdentityDbContext<CustomUser> { }讓建構子呼叫 base class 建構子並傳入正確連線字串
這邊使用
DefaultConnection當做做範例,請實際情況修改public ApplicationDbContext(): base("DefaultConnection", throwIfV1Schema: false) { }建立 Create 方法
public static ApplicationDbContext Create()
{
    return new ApplicationDbContext();
}
自訂 DbContext 完整程式碼
using Microsoft.AspNet.Identity.EntityFramework;

namespace AddIdentity.Models
{
    public class ApplicationDbContext : IdentityDbContext<CustomUser>
    {
        public ApplicationDbContext() : base("DefaultConnection", throwIfV1Schema: false)
        {
        }

        public static ApplicationDbContext Create()
        {
            return new ApplicationDbContext();
        }
    }
}
在 App_Start 資料夾中加入 IdentityConfig.cs
建立
ApplicationUserManagerclass用來管理 user 建立功能
建立
ApplicationUserManager繼承UserManager<CustomUser>public class ApplicationUserManager : UserManager<CustomUser> { }讓建構子呼叫 base class 建構子
public ApplicationUserManager(IUserStore<CustomUser> store): base(store)
{
}
建立 Create 方法
public static ApplicationUserManager Create(IdentityFactoryOptions<ApplicationUserManager> options, IOwinContext context)
{
    var manager = new ApplicationUserManager(new UserStore<CustomUser>(context.Get<ApplicationDbContext>()));
    // 設定 usernames 驗證邏輯
    manager.UserValidator = new UserValidator<CustomUser>(manager)
    {
        AllowOnlyAlphanumericUserNames = false,
        RequireUniqueEmail = true
    };

    // 設定密碼驗證邏輯
    manager.PasswordValidator = new PasswordValidator
    {
        RequiredLength = 6,
        RequireNonLetterOrDigit = true,
        RequireDigit = true,
        RequireLowercase = true,
        RequireUppercase = true,
    };

    // 設定 user 預設鎖定
    manager.UserLockoutEnabledByDefault = false;
    manager.DefaultAccountLockoutTimeSpan = TimeSpan.FromMinutes(5);
    manager.MaxFailedAccessAttemptsBeforeLockout = 5;

    // 設定兩因子驗證 (two factor authentication). 這邊示範使用簡訊及 Emails
    manager.RegisterTwoFactorProvider("Phone Code", new PhoneNumberTokenProvider<CustomUser>
    {
        MessageFormat = "Your security code is {0}"
    });
    manager.RegisterTwoFactorProvider("Email Code", new EmailTokenProvider<CustomUser>
    {
        Subject = "Security Code",
        BodyFormat = "Your security code is {0}"
    });
    // 設定 Email 服務
    manager.EmailService = new EmailService();
    // 設定簡訊服務
    manager.SmsService = new SmsService();
    var dataProtectionProvider = options.DataProtectionProvider;
    if (dataProtectionProvider != null)
    {
        manager.UserTokenProvider =
            new DataProtectorTokenProvider<CustomUser>(dataProtectionProvider.Create("ASP.NET Identity"));
    }
    return manager;
}
建立
ApplicationSignInManagerclass用來管理 user 登入
建立
ApplicationSignInManager繼承SignInManager<CustomUser, string>public class ApplicationSignInManager : SignInManager<CustomUser, string> { }建構子呼叫 base class 建構子
public ApplicationSignInManager(ApplicationUserManager userManager, IAuthenticationManager authenticationManager): base(userManager, authenticationManager)
{
}
覆寫
CreateUserIdentityAsync方法public override Task<ClaimsIdentity> CreateUserIdentityAsync(CustomUser user) { return user.GenerateUserIdentityAsync((ApplicationUserManager)UserManager); }建立 Create 方法
public static ApplicationSignInManager Create(IdentityFactoryOptions<ApplicationSignInManager> options, IOwinContext context)
{
    return new ApplicationSignInManager(context.GetUserManager<ApplicationUserManager>(), context.Authentication);
}
完整程式碼
using System;
using System.Security.Claims;
using System.Threading.Tasks;
using AddIdentity.Models;
using Microsoft.AspNet.Identity;
using Microsoft.AspNet.Identity.EntityFramework;
using Microsoft.AspNet.Identity.Owin;
using Microsoft.Owin;
using Microsoft.Owin.Security;

namespace AddIdentity
{
    public class EmailService : IIdentityMessageService
    {
        public Task SendAsync(IdentityMessage message)
        {
            // Plug in your email service here to send an email.
            return Task.FromResult(0);
        }
    }

    public class SmsService : IIdentityMessageService
    {
        public Task SendAsync(IdentityMessage message)
        {
            // Plug in your SMS service here to send a text message.
            return Task.FromResult(0);
        }
    }
    public class ApplicationUserManager : UserManager<CustomUser>
    {
        public ApplicationUserManager(IUserStore<CustomUser> store) : base(store)
        {
        }

        public static ApplicationUserManager Create(IdentityFactoryOptions<ApplicationUserManager> options, IOwinContext context)
        {
            var manager = new ApplicationUserManager(new UserStore<CustomUser>(context.Get<ApplicationDbContext>()));
            // 設定 usernames 驗證邏輯
            manager.UserValidator = new UserValidator<CustomUser>(manager)
            {
                AllowOnlyAlphanumericUserNames = false,
                RequireUniqueEmail = true
            };

            // 設定密碼驗證邏輯
            manager.PasswordValidator = new PasswordValidator
            {
                RequiredLength = 6,
                RequireNonLetterOrDigit = true,
                RequireDigit = true,
                RequireLowercase = true,
                RequireUppercase = true,
            };

            // 設定 user 預設鎖定
            manager.UserLockoutEnabledByDefault = false;
            manager.DefaultAccountLockoutTimeSpan = TimeSpan.FromMinutes(5);
            manager.MaxFailedAccessAttemptsBeforeLockout = 5;

            // 設定兩因子驗證 (two factor authentication). 這邊示範使用簡訊及 Emails
            manager.RegisterTwoFactorProvider("Phone Code", new PhoneNumberTokenProvider<CustomUser>
            {
                MessageFormat = "Your security code is {0}"
            });
            manager.RegisterTwoFactorProvider("Email Code", new EmailTokenProvider<CustomUser>
            {
                Subject = "Security Code",
                BodyFormat = "Your security code is {0}"
            });
            // 設定 Email 服務
            manager.EmailService = new EmailService();
            // 設定簡訊服務
            manager.SmsService = new SmsService();
            var dataProtectionProvider = options.DataProtectionProvider;
            if (dataProtectionProvider != null)
            {
                manager.UserTokenProvider =
                    new DataProtectorTokenProvider<CustomUser>(dataProtectionProvider.Create("ASP.NET Identity"));
            }
            return manager;
        }

    }
    public class ApplicationSignInManager : SignInManager<CustomUser, string>
    {
        public ApplicationSignInManager(ApplicationUserManager userManager, IAuthenticationManager authenticationManager) : base(userManager, authenticationManager)
        {
        }

        public override Task<ClaimsIdentity> CreateUserIdentityAsync(CustomUser user)
        {
            return user.GenerateUserIdentityAsync((ApplicationUserManager)UserManager);
        }

        public static ApplicationSignInManager Create(IdentityFactoryOptions<ApplicationSignInManager> options, IOwinContext context)
        {
            return new ApplicationSignInManager(context.GetUserManager<ApplicationUserManager>(), context.Authentication);
        }
    }
}
在 App_Start 目錄中加入 Startup.Auth.cs
建立
Startupclasspublic partial class Startup { }建立
ConfigureAuth方法public void ConfigureAuth(IAppBuilder app) { app.CreatePerOwinContext(ApplicationDbContext.Create); app.CreatePerOwinContext<ApplicationUserManager>(ApplicationUserManager.Create); app.CreatePerOwinContext<ApplicationSignInManager>(ApplicationSignInManager.Create); app.UseCookieAuthentication(new CookieAuthenticationOptions { AuthenticationType = DefaultAuthenticationTypes.ApplicationCookie, LoginPath = new PathString("/Account/Register"), Provider = new CookieAuthenticationProvider { OnValidateIdentity = SecurityStampValidator.OnValidateIdentity<ApplicationUserManager, CustomUser>( validateInterval: TimeSpan.FromMinutes(30), regenerateIdentity: (manager, user) => user.GenerateUserIdentityAsync(manager)) } }); app.UseExternalSignInCookie(DefaultAuthenticationTypes.ExternalCookie); }完整程式碼
using System; using AddIdentity.Models; using Microsoft.AspNet.Identity; using Microsoft.AspNet.Identity.Owin; using Microsoft.Owin; using Microsoft.Owin.Security.Cookies; using Owin; namespace AddIdentity { public partial class Startup { public void ConfigureAuth(IAppBuilder app) { app.CreatePerOwinContext(ApplicationDbContext.Create); app.CreatePerOwinContext<ApplicationUserManager>(ApplicationUserManager.Create); app.CreatePerOwinContext<ApplicationSignInManager>(ApplicationSignInManager.Create); app.UseCookieAuthentication(new CookieAuthenticationOptions { AuthenticationType = DefaultAuthenticationTypes.ApplicationCookie, LoginPath = new PathString("/Account/Register"), Provider = new CookieAuthenticationProvider { OnValidateIdentity = SecurityStampValidator.OnValidateIdentity<ApplicationUserManager, CustomUser>( validateInterval: TimeSpan.FromMinutes(30), regenerateIdentity: (manager, user) => user.GenerateUserIdentityAsync(manager)) } }); app.UseExternalSignInCookie(DefaultAuthenticationTypes.ExternalCookie); } } }
在根目錄加入 Startup.cs
用來將 Identity 註冊至 OWIN 中
建立 Startup class
public partial class Startup { }加入 Configuration 方法
public void Configuration(IAppBuilder app)
{
    ConfigureAuth(app);
}
在 namespace 上加入
OwinStartupAttribute[assembly: OwinStartup(typeof(AddIdentity.Startup))]完整程式碼
using Microsoft.Owin;
using Owin;

[assembly: OwinStartup(typeof(AddIdentity.Startup))]
namespace AddIdentity
{
    public partial class Startup
    {
        public void Configuration(IAppBuilder app)
        {
            ConfigureAuth(app);
        }
    }
}
實際使用時注意事項 - 以 Register 為例
建立
AccountController繼承 Controllerpublic class AccountController : Controller { }加入
SignInManager與UserManagerprivate ApplicationSignInManager _signInManager; private ApplicationUserManager _userManager; public ApplicationSignInManager SignInManager { get => _signInManager ?? HttpContext.GetOwinContext().Get<ApplicationSignInManager>(); private set => _signInManager = value; } public ApplicationUserManager UserManager { get => _userManager ?? HttpContext.GetOwinContext().GetUserManager<ApplicationUserManager>(); private set => _userManager = value; }加入建構子
public AccountController()
{
}

public AccountController(ApplicationUserManager userManager, ApplicationSignInManager signInManager)
{
    UserManager = userManager;
    SignInManager = signInManager;
}
加入 Register
[AllowAnonymous]
public ActionResult Register()
{
    return View();
}

//
// POST: /Account/Register
[HttpPost]
[AllowAnonymous]
[ValidateAntiForgeryToken]
public async Task<ActionResult> Register(RegisterViewModel model)
{
    if (ModelState.IsValid)
    {
        var user = new CustomUser { UserName = model.Email, Email = model.Email};
        var result = await UserManager.CreateAsync(user, model.Password);
        if (result.Succeeded)
        {
            await SignInManager.SignInAsync(user, isPersistent:false, rememberBrowser:false);
            return RedirectToAction("Index", "Home");
        }
        AddErrors(result);
    }
    return View(model);
}
建立
RegisterViewModelpublic class RegisterViewModel { [Required] [EmailAddress] [Display(Name = "Email")] public string Email { get; set; } [Required] [StringLength(100, ErrorMessage = "The {0} must be at least {2} characters long.", MinimumLength = 6)] [DataType(DataType.Password)] [Display(Name = "Password")] public string Password { get; set; } [DataType(DataType.Password)] [Display(Name = "Confirm password")] [Compare("Password", ErrorMessage = "The password and confirmation password do not match.")] public string ConfirmPassword { get; set; } }建立
AddErrorsprivate void AddErrors(IdentityResult result) { foreach (var error in result.Errors) { ModelState.AddModelError("", error); } }建立
Registerview@model AddIdentity.Models.RegisterViewModel @{ ViewBag.Title = "Register"; } <h2>@ViewBag.Title.</h2> @using (Html.BeginForm("Register", "Account", FormMethod.Post, new { @class = "form-horizontal", role = "form" })) { @Html.AntiForgeryToken() <h4>Create a new account.</h4> <hr /> @Html.ValidationSummary("", new { @class = "text-danger" }) <div class="form-group"> @Html.LabelFor(m => m.Email, new { @class = "col-md-2 control-label" }) <div class="col-md-10"> @Html.TextBoxFor(m => m.Email, new { @class = "form-control" }) </div> </div> <div class="form-group"> @Html.LabelFor(m => m.Password, new { @class = "col-md-2 control-label" }) <div class="col-md-10"> @Html.PasswordFor(m => m.Password, new { @class = "form-control" }) </div> </div> <div class="form-group"> @Html.LabelFor(m => m.ConfirmPassword, new { @class = "col-md-2 control-label" }) <div class="col-md-10"> @Html.PasswordFor(m => m.ConfirmPassword, new { @class = "form-control" }) </div> </div> <div class="form-group"> <div class="col-md-offset-2 col-md-10"> <input type="submit" class="btn btn-default" value="Register" /> </div> </div> }效果
預設使用 CodeFirst 會自動將需要的 table 產生出來

自訂的
Address屬性也已被加入
心得
將 ASP.NET Identity 加入 MVC Empty 專案的動作,我做了好幾次,但從來沒有一次搞定完全不用查資料過,所以趁著假日又重做了一次,好好地紀錄一下,期望下次可以節省一些時間
回到將 ASP.NET Identity 加入 MVC Empty 專案本身,我個人覺得需要執行的動作不少,有些眉眉角角得要注意,如果不是因為反覆參考 MVC 預設專案,我不認為可以輕鬆完成,這個部份可能還是有些改善的空間
參考資訊
文章作者 Yowko Tsai
上次更新 2021-11-03
授權合約
本部落格 (Yowko's Notes) 所有的文章內容(包含圖片),任何轉載行為,必須通知並獲本部落格作者 (Yowko Tsai) 的同意始得轉載,且轉載皆須註明出處與作者。
Yowko's Notes 由 Yowko Tsai 製作,以創用CC 姓名標示-非商業性-相同方式分享 3.0 台灣 授權條款 釋出。